As a PadSplit host, showcasing your rooms in the best light possible (literally) is vital for attracting residents. High-quality listing photos are one of the MAIN factors that will influence how quickly you can book your property. With the significant investment you’ve made into the property, it’s not worth having low-quality photos that can affect your revenue.
No matter how fantastic your space is, if your listing features dull or poor-quality photos, customers will struggle to trust that it’s a rental they’d want to call home. Imagine yourself as a member looking for a place to stay. You’d naturally be drawn to a property that showcases high-quality photos before making a booking.
Let’s explore how to craft stunning visuals of your space with any type of equipment you’re working with, whether you’re using your smartphone or a professional camera.
General considerations for aesthetic
Before you start snapping photos, it’s essential to prepare your home from the inside out. Clean the interior and exterior of the home, or hire a professional cleaning company in advance. Outside, your front lawn and porch should look inviting and well-kept so members know you take pride in their potential home. Bonus points for a freshly painted front door or friendly welcome mat.
Start with the lighting
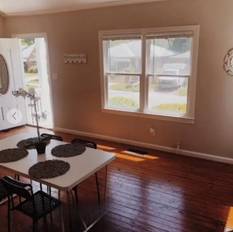
Lighting is another crucial aspect of real estate photography. Take advantage of the natural light your space offers by planning to take photos when you know the light will best complement the space. If you have special features, like skylights, stained glass, or other unique windows, consider when the natural light provided looks the most flattering. Using artificial light is also effective, making it necessary to use natural light, artificial light, or both.
This photo needs improvement:
This photo is what we recommend:
When composing shots, pay attention to leading lines and symmetry to create balanced and visually appealing photos. For real estate photos, it’s almost always best to shoot from “eye height” (typically around 5-6 feet) to provide the most complimentary view of the room. This makes it much easier to keep the vertical lines of the room in your photos straight, allowing for a proportionate composition.
Using your smartphone
If you prefer to take photos with your smartphone, there are several apps and add-on lenses that can elevate your real estate photos.
Helpful mobile and desktop apps
Adobe Lightroom allows you to make professional-grade adjustments to the exposure, clarity, and much more. You can also purchase cost-effective presets online that are geared specifically towards real estate photography. For both smartphone and traditional camera shots, Lightroom is the champion in terms of professional editing options. You can even utilize the power of Adobe on the go with the Adobe Lightroom Mobile smartphone app.
Snapseed, the Google-powered mobile photo editing app, is wonderful for a wide range of editing features, including spot removal and lighting adjustments.
Exposio Real Estate Camera may be the most convenient real estate photo tool of all. This stellar smartphone app helps users create HDR and wide-angle real-estate photos with their phones. Unlike Lightroom and Snapseed, Exposio has a much smaller learning curve and does most of the heavy lifting for the user. It also offers a variety of realistic sky photos to further enhance outdoor photos of your listing.
Add-on lenses
While your smartphone’s camera may have a pretty good lens, adding a professional-grade lens attachment to your phone’s camera will uplevel your professional-grade lens attachment. These attachments clip onto your phone to offer a wider field of view and better clarity than a phone camera alone.
Opting for a camera
Just like the phone option, you’ll want to invest in a wide-angle lens for your kit to capture the entirety of the rooms you’re listing. The Canon 17-40mm, Canon 16-35mm, Sony 16-35mm, and Nikon 16-35mm lenses are great options at a variety of price points. If you’re looking for the most bang for your buck, go with the Canon 17-40mm.
Staging the home
Bedrooms
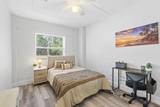
Staging each room will make it easier to quickly increase bookings. Rooms with bare mattresses that lack bedding don’t appear as cozy or high-quality to members. We recommend always adding bedding and pillows.
This photo needs improvement:
This photo is what we recommend:
Bathrooms
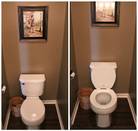
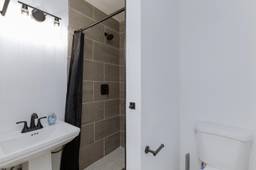
When taking photos of the bathrooms in the PadSplit, we recommend putting the toilet seats down and hanging shower curtains.
This photo needs improvement:
This photo is what we recommend:
Hiring a professional photographer
If you want top-notch real estate photos without the time investment, hiring a professional real estate photographer is the way to go.
Consider utilizing PadSplit’s vendor network to find a vetted professional. Our network is comprised of seasoned professionals, including contractors, property managers, and, of course, photographers. Search for a pro with this link, or contact your PadSplit representative for a referral.
Once you’ve found the right pro, create a list of rooms you want to be photographed. Include a list of spaces, details, and amenities you want to showcase in your listing. The more details on amenities you can give renters, the better.
Uploading photos to your listing
Opt for horizontal (landscape) images for your PadSplit listing. These capture the entire room in one frame, providing a comprehensive view of your space. Horizontal photos also display better on our site and partner platforms, maximizing the appeal of your listing. Vertical (portrait) images, on the other hand, may present poorly, potentially diminishing your listing’s impact.
Aim for a 16:9 ratio with dimensions of 1920 x 1080 pixels, and make sure the image size is 6.3MB or smaller for optimal results. This ensures your photos appear sharp and vibrant, enticing potential tenants to explore every corner of your PadSplit space.
Make every photo a winner
Since most photos are used for promotion, ensure each one showcases the best aspects of your PadSplit (showcasing space, not details). Avoid photos of door locks, door numbers, and other non-essential elements. Instead, highlight these amenities within the property description.
Review and remove any property approval photos from your public listing. Include images of the private bathrooms and bedroom amenities. Numbering the photos before uploading them will streamline the process and save time.
Lastly, choose the best photo as the cover photo for the listing. While it may be tempting, refrain from using any stock photos to advertise your property. The images used MUST represent your property.
You’ve got this
By following these tips and leveraging the right tools, you can showcase your PadSplit property in a compelling, beautiful way. Whether you choose to use your smartphone, invest in a personal camera setup, or hire a professional photographer from our vendor network, dedicating effort to high-quality photos of your hard work can maximize your ROI. Now, go take some amazing photos!


